Django
快速开始
- 安装Django
# 全局安装django
pip install django

# 使用 pipenv 创建虚拟环境并安装 Django
mkdir startdjango && cd startdjango
pipenv shell  # 创建虚拟环境
pipenv install django # 在虚拟环境中安装django- 创建项目
django-admin startproject [项目名称]  # 新建一个django项目

django-admin startproject [项目目录] . # 在当前目录创建django项目- 创建APP
python manage.py startapp [APP名称]- 运行项目
python manage.py runserver项目文件架构
django_project           → 项目根目录
├── django_project       → 项目配置目录(与项目同名)
│   ├── __init__.py      → 标识为Python包
│   ├── settings.py      → 全局配置(常修改)
│   ├── urls.py          → 主路由配置(常修改)
│   ├── asgi.py          → ASGI服务器配置, 异步接收网络请求
│   └── wsgi.py          → WSGI服务器配置, 同步接收网络请求
├── static/
│   ├── css/
│   │   └── style.css
│   ├── js/
│   │   └── script.js
│   └── images/
│       └── logo.png
└── manage.py            → 项目的管理,启动项目、创建app、数据管理(常使用)
APP
在 Django 中,APP(应用) 是一个可重用的功能模块,用于实现特定的业务逻辑。它是 Django 项目的基本组成单元,遵循 "一个APP只做一件事" 的设计原则。
- 独立性: 每个APP是一个独立的Python包,包含完整的功能闭环(模型、视图、模板等)
- 低耦合:APP之间应通过公共接口通信,尽量减少直接依赖
- 可复用:每个APP可以单独摘出来跨项目复用
- 配置分离:敏感配置应放在项目settings中,而非APP内
- 项目
  - 业务APP: 用户管理、订单系统等(需自行开发)
  - 通用APP: 评论系统、API接口等(可第三方安装)
  - 内置APP: admin(后台)、auth(认证)、sessions 等
创建APP
在项目根目录下执行bashpython manage.py startapp blog_app会在此项目文件夹下创建新app如下:
markdownblog_app # APP名称(Python包) ├── migrations/ # 数据库变更记录(自动生成) │ ├── __init__.py │ ├── templates/ # 专属模板目录(html文件) │ └── blog_app/ # 推荐加APP名前缀避免命名冲突 │ ├── base.html │ ├── post_list.html │ └── post_detail.html │ ├── static/ # 专属静态文件(图片、css、js等文件) │ └── blog_app/ │ ├── js/ │ ├── plugins/ # 推荐加APP名前缀避免命名冲突 │ ├── css/ │ │ └── style.css │ └── images/ │ └── logo.png │ ├── __init__.py ├── admin.py # django默认提供了admin后台管理 ├── apps.py # APP配置类(自动生成) ├── models.py # 数据模型定义(重要,数据库操作相关) ├── tests.py # 单元测试 ├── urls.py # 子路由配置(需手动创建) └── views.py # 视图逻辑(重要,函数)注册APP
将新创建的app添加到项目同名目录下的settings.py文件中的INSTALLED_APPS列表中,格式为'app_name.apps.App_nameConfig'。pythonINSTALLED_APPS = [ 'django.contrib.admin', 'django.contrib.auth', 'django.contrib.contenttypes', 'django.contrib.sessions', 'django.contrib.messages', 'django.contrib.staticfiles', 'blog_app.apps.BlogAppConfig', # 注册新创建的app ]
URL
URL介绍
URL是Uniform Resource Locator的简写,即统一资源定位符
一个URL由以下几个部分组成:

- Scheme:访问协议,一般是http或者https或ftp等
- Domain Name:域名或ip地址,比如
www.baidu.com - Port:端口号,
http协议是80端口,https是443端口 - Path to the file:用来指定资源的路径
- Parameters:查询字符串,比如:
www.baidu.com/s?wd=python, 后面的wd=python就是查询字符串 - Anchor:锚点,用于前端做页面定位
注意:URL中所有字符都基于ASCII字符集,浏览器会对中文字符先进行编码再传输
路由模块化
django可以在app内部写自己的urls.py, 而在项目的urls.py中包含这个app的urls.py。
# django_project/django_project/urls.py
from django.urls import path, include
urlpatterns = [
    path('admin/', admin.site.urls),
    path('blog/', include('blog_app.urls')),  # 将blog/的请求交给blog_app/urls.py处理
]# django_project/blog_app/urls.py
from django.urls import path
from . import views
urlpatterns = [
path('articles/', views.article_list), # 显示所有文章列表
path('article/<int:id>/', views.article_detail),
]# django_project/blog_app/views.py
from django.shortcuts import render, HttpResponse
def article_list(request):
# 示例1:返回HTTP页面
return render(request, "article_list.html")
def article_detail(request, id)
# 示例2:返回文本内容
return HttpResponse(f"文章ID:{id}")path 和 re_path 方法
Django提供了两种设计URL的方法:path 和 re_path, 它们均支持视图函数或类传递参数。path 和 re_path支持传递的数据类型只有 str, int, slug, uuid四种。一般来说 re_path 更强大,但写起来更复杂一些:
- path方法python
path(route, view, name=None, kwargs = None) # 参数说明: # route:url的匹配规则。这个参数中可以指定url中需要传递的参数。 # 传递参数是通过<>来指定的,并且可以指定以下几种常用类型: # str:默认类型,非空字符串,字符串内容不能包含斜杠'/' # int: 一般整形 # slug:由横杠'-'或下划线'_'连接英文字符或数字组成的字符串,如:abc-122_dasd # uuid: 匹配uuid字符串 # path:可用来传递文件路径等,如:'C:/Document/demo.txt' # view: 可以是视图函数、类视图或者是django.urls.include()函数的返回值 # name: url别名,当项目庞大,url较多时,需要对每个url起别名python# 使用<变量类型:变量名> or <变量名>传递, 例如 <int:id> 或 <username> urlpatterns = [ path('blog_app/articles/<int:id>/', views.article_detail), ] - re_path方法python示例
# `re_path`方法是采用正则表达式regex匹配 # 采用命名组(?P<变量名>表达式)的方式传递参数 # 使用re_path时不一定总是以$结尾 urlpatterns = [ re_path(r'^blog_app/articles/(?P<id>\d+)/$', views.article_detail), ]python# 示例一,path方法 from django.urls import path from . import views urlpatterns = [ path('articles/2003/', views.special_case_2003), path('articles/<int:year>/', views.year_archive), path('articles/<int:year>/<int:month>/', views.month_archive), path('articles/<int:year>/<int:month>/<slug:slug>/', views.article_detail), ] # 示例二:re_path方法,结果与上例等同 from django.urls import path, re_path from . import views urlpatterns = [ path('articles/2003/', views.special_case_2003), re_path(r'^articles/(?P<year>[0-9]{4})/$', views.year_archive), re_path(r'^articles/(?P<year>[0-9]{4})/(?P<month>[0-9]{2})/$', views.month_archive), re_path(r'^articles/(?P<year>[0-9]{4})/(?P<month>[0-9]{2})/(?P<slug>[\w-]+)/$', views.article_detail), ]
URL的命名与命名空间
url的命名
为url命名可以根据
path.name反向读取路径python# django_project/blog_app/urls.py from django.urls import path, re_path from . import views app_name = 'blog_app' # 命名空间 urlpatterns = [ path('articles/', views.article_list, name = 'article_list'), path('articles/<int:id>/', views.article_detail, name = 'article_detail'), ]命名空间
命名空间的主要作用是避免不同应用(App)之间的路由名称发生冲突。它为你应用的 URL 名称提供了一个唯一的标识符,模版中可以根据命名空间明确地指向某个特定应用下的特定路由。 例如:
博客应用(
blog) 有一个显示文章详情的视图,其 URL 被命名为detail。用户应用(
users) 有一个显示用户资料的视图,其 URL 也被命名为detail。如果在模板中使用
{% url 'detail' article.id %},Django 将无法确定你到底想引用哪个应用的detail。它会按照注册顺序查找,找到第一个匹配的就会使用,这很可能导致链接指向错误的页面。方法一: 在项目的主
urls.py中定义命名空间python# 项目根 urls.py from django.urls import include, path # 通过 include() 指定 namespace # include() 函数的参数是一个元组 (urlconf_module, app_name),然后再跟 namespace 参数。 urlpatterns = [ path('blog/', include(('blog_app.urls, blog'), namespace='blog')), # 命名空间 blog, 模板中使用 `{% url 'blog:detail' article.id %}` path('user/', include(('user.urls, user'), namespace='user')), # 命名空间 news,模板中使用 `{% url 'user:detail' article.id %}` ]方法二: 在应用的
urls.py中定义app_nameblog/urls.pypythonfrom django.urls import path from . import views # 在这里定义应用的应用名(app_name),这也会被用作命名空间 app_name = 'blog' urlpatterns = [ path('article/<int:pk>/', views.article_detail, name='detail'), ]user/urls.pypythonfrom django.urls import path from . import views app_name = 'users' urlpatterns = [ path('profile/<int:user_id>/', views.user_profile, name='detail'), ]- 然后在项目的
urls.py, 可以简写为pythonurlpatterns = [ path('blog/', include('blog.urls')), # Django 会自动使用 blog.urls 中定义的 app_name 作为命名空间 path('user/', include('users.urls')), ]
URL的反向解析
当知道path.name,可以通过reverse()反向解析出对应path路径
在视图函数中:
pythonfrom django.urls import reverse def my_view(request): url_1 = reverse('article_list') # 生成 /blog_app/articles/ url_2 = reverse('article_detail', kwargs={'slug': 1}) # kwargs用字典传递命名参数,生成 /blog_app/articles/1/如果有应用命名空间,那么反向解析时应加上命名空间:
pythonurl_1 = reverse('blog_app:article_list') # 生成 /blog_app/articles/ url_2 = reverse('blog_app:article_detail', kwargs={'slug': 1}) # 生成 /blog_app/articles/1/支持位置参数或关键字参数:
pythonreverse('article_detail', args=(1,)) # args使用元祖传递位置参数 reverse('article_detail', kwargs={'pk': 1}) # kwargs使用字典传递关键字参数
注意:reverse反转url时不区分GET请求和POST请求,因此不能在反转的时候传递query-srting参数。如果想要添加query-srting参数,只能手动添加:
login_url = reverse('article_list‘) + '?year=2023'
> /articles?year=2023
URL传参方式
- 路径传参
这是最常用的方式,直接在URL路径中包含参数如:http://127.0.0.1:8000/articles/2008/3/
# urls.py
from django.urls import path
from . import views

urlpatterns = [
  # 需定义参数的类型,如果类型不匹配就跳转404页面
  path('articles/<int:year>/<int:month>/', views.month_archive),
]# views.py
def month_archive(request, year, month):
return HttpResponse(f"您查找的文章日期为:{year}年{month}月")- Query-String
如:https://127.0.0.1:8000/articles?year=2008&month=12python# urls.py from django.urls import path from . import views urlpatterns = [ # 使用query-string传参时路径没有'/' path('articles', views.year_archive, name='article_by_year'), ]python# views.py def article_list(request): year = request.GET.get('year') month = request.GET.get('month') return HttpResponse(f"您查找的文章日期为:{year}年{month}月")
视图(View)
Django的视图(View)是处理业务逻辑的核心,她负责处理用户的请求并返回响应数据。Django提供了两种编写视图的方式:
- 基于函数的视图
- 基于类的视图
基于函数的视图(FBV)
这是最直观、最初级的方式。您定义一个简单的 Python 函数,它接收一个 HttpRequest 对象作为第一个参数(通常命名为 request),并必须返回一个 HttpResponse 对象。
示例:显示一个文章列表
# views.py
from django.shortcuts import render
from .models import Article

def article_list(request):
    if request.method == 'GET':
        articles = Article.objects.all() # 从数据库获取所有文章
        return render(request, 'blog/article_list.html', {'articles': articles})
优点:
简单明了: 流程非常清晰,易于初学者理解。
直接控制: 对于简单的逻辑,代码非常直接,没有多余的“魔法”。
缺点:
代码重复: 对于处理不同 HTTP 方法(GET, POST)的视图,需要使用 if 语句进行判断,导致代码变得冗长。
难以复用: 扩展性较差,如果想在多个视图间复用一些功能(如登录检查),通常需要使用装饰器,不如类的继承方式优雅。
基于类的视图(CBV)
这是一种更高级、更结构化的方式。您定义一个类,这个类继承自 Django 提供的各种基础视图类。不同的类方法用于处理不同的 HTTP 请求方法。
使用基于类的视图时, 在URLconf中需要将他们传递到as_view()方法中调用:
urlpatterns = [
    path("about/", TemplateView.as_view(template_name="about.html")),
]
例如,在基于函数的视图中的以下代码:
from django.http import HttpResponse

def my_view(request):
    if request.method == "GET":
        # <view logic>
        return HttpResponse("result")
    if request.method == "POST":
        # <view logic>
        ...
    ...
而在基于类的视图里, 会变成:
from django.http import HttpResponse
from django.views import View

class MyView(View):
    def get(self, request):
        # <view logic>
        return HttpResponse("result")
    def post(self, request):
        ...
    ...
基于类的视图有一个 as_view() 类方法,当一个请求到达的 URL 被关联模式匹配时,as_view() 返回一个 view 函数。这个函数创建对应类的实例,调用 setup() 初始化它的属性,然后返回 dispatch() 方法。 dispatch 观察请求并决定它是 GET 和 POST 等等。如果它被定义,那么依靠请求来匹配方法,否则会引发 HttpResponseNotAllowed 。
# urls.py
from django.urls import path
from myapp.views import MyView

urlpatterns = [
    path("about/", MyView.as_view()),
]
当基于类的视图中有类属性时, URLconf 中可以通过 as_view() 传值来更新类属性的值:
# views.py
class GreetingView(View):
    greeting = "Good Day"

    def get(self, request):
return HttpResponse(self.greeting)# urls.py
urlpatterns = [
path("about/", GreetingView.as_view(greeting="G'day")),
]内置的基于类的通用视图
官方文档参考: https://docs.djangoproject.com/zh-hans/5.2/ref/class-based-views/
展示视图(Display View)
主要用于展示数据。
ListView- 展示对象列表用于显示一个模型(Model)的多条记录的列表
核心属性:
model: 指定要显示的模型queryset: 提取要显示的对象或数据集(比model优先级高)template_name: 指定使用多个模板名称。默认是<app_name>/<model_name>_list.html, 如books/book_list.htmlcontext_object_name: 指定模板中上下文变量的名称。默认是object_list, 通常我们会改为更友好的名字,如book_list
核心方法:
get_queryset(): 返回用于列表的查询集。重写此方法可以添加过滤、排序等逻辑。get_context_data(**kwargs): 向模板传递额外的上下文数据。
示例1: 比如我们希望展示所有的文章列表,我们的
views.py可以简化为python# Create your views here. from django.views.generic import ListView from .models import Article class IndexView(ListView): model = Article上述代码等同于:
python# 展示所有文章 def index(request): queryset = Article.objects.all() return render(request, 'blog/article_list.html', {"article_list": queryset})尽管我们只写了一行
model = Article,ListView实际上在背后做了很多事情:- 提取了需要显示的对象列表或数据集
queryset: Article.objects.all() - 指定了用来显示对象列表的模板名称: 默认
<app_name>/<model_name>_list.html, 即blog/article_list.html. - 指定了内容对象名称(
context_object_name):默认值object_list, 即``
DetailView - 显示对象详情 用于展示一个模型(Model)的某条记录的详细信息。
核心属性:
model: 指定要展示的模型queryset: 提取要展示的对象或数据集(比model优先级高)template_name: 指定模板名称。默认是<app_name>/<model_name>_list.html。context_object_name: 指定模板中上下文变量的名称。默认是objectpk_url_kwarg: URLconf中捕获的主键参数的名称,默认为pk
核心方法:
get_object(): 返回要显示的单个对象。重写此方法可以实现更复杂的对象获取逻辑(例如,使用slug字段而不是pk)。
编辑视图(Editing Views)
用于处理表单,创建、更新和删除对象。
CreateView - 创建对象 显示一个空表单用于创建新对象,并在用户提交有效数据后保存对象。
核心属性:
model: 要创建的模型。fields: 表单中要显示的字段列表(例如['title', 'author', 'publish_date'])。使用__all__包含所有字段。template_name: 默认值是<app_name>/<model_name>_form.html。
核心方法: - form_valid(form) : 当表单验证通过时调用, 可以在此处添加自定义逻辑(如设置当前用户为作者),然后再保存对象。
UpdateView - 更新对象 类似于
CreateView, 但它用于编辑一个已经存在的对象。表单会预先填充该对象的数据。核心属性:
model: 要创建的模型。fields: 表单中要显示的字段列表(例如['title', 'author', 'publish_date'])。使用__all__包含所有字段。template_name: 默认值是<app_name>/<model_name>_form.html。
核心方法:
get_oibject(): 获取想要编辑的对象实例。form_valid(form): 同上,可用于保存前的自定义操作。
DeleteView - 删除对象 显示一个确认页面, POST请求后删除指定对象。
核心属性:
model: 要删除的模型template_name: 默认是<app_name>/<model_name>_confirm_delete.htmlsuccess_url: 删除成功后重定向的URL(必选参数, 因为对象不存在的话就无法使用get_absolute_url)
核心属性:
delete(): 执行删除操作的方法, 可以重写以实现软删除等其他逻辑
日期归档视图(Date-Based Views)
用于按日期归档显示内容,常用于博客、新闻等应用。他们都是ListView的子类, 但提供了基于日期的切片功能。
包含:
ArchiveIndexView: 显示最新的对象列表,按日期字段排序。YearArchiveView: 显示指定年份的所有对象。MonthArchiveView: 显示指定年、月的所有对象。WeekArchiveView: 显示指定年、周的所有对象。DayArchiveView: 显示指定年、月、日的所有对象。TodayArchiveView: 显示今天的所有对象,是 DayArchiveView 的特殊情况。DateDetailView: 显示指定年、月、日的单个对象的详细信息。
这些视图需要配置 date_field(指定模型的日期字段)、allow_future(是否包含未来日期的对象)等属性。
总结
| 视图类 | 主要用途 | 对应 HTTP 方法 |
|---|---|---|
| ListView | 显示对象列表 | GET |
| DetailView | 显示对象详情 | GET |
| CreateView | 创建新对象 | GET (空表单), POST (提交表单) |
| UpdateView | 更新现有对象 | GET (填充表单), POST (提交表单) |
| DeleteView | 删除对象 | GET (确认页), POST (执行删除) |
模板(Template)
Django自带的模板引擎是DTL(Django Tamplate Language),当然Django也支持Jinja2等其他模板引擎。
官方文档参考:Django模板
模板的渲染
render_to_string: 找到模板,将模板编译后渲染成Python字符串格式,然后通过HttpResponse类包装成一个HttpResponse对象返回。
from django.template.loader import render_to_string
from django.http import HttpResponse
def article_detail(request, book_id):
  html = render_to_string('detail.html')
return HttpResponse(html)- 使用**
render**一步到位完成渲染成字符串 + 包装成HttpResponse对象:
# 使用render.context向模板传递参数,context是字典类型
from django.shortcuts import render
def article_list(request):
  return render(request, 'list.html', context={
    'username': '张三',
    'parent': ['father', 'mother'],
    'age': 10
    })
变量
变量被包围在双层
{中,就像这样:html<p>My first name is {{ first_name }}. My last name is {{ last_name }}.</p>字典查找、属性查找和列表索引查找都使用点表示法实现:
html<p>{{ my_dict.key }}</p> <p>{{ my_object.attribute }}</p> <p>{{ my_list.0 }}</p>变量可以渲染对象:
python# views.py from django.shortcuts import render class Person: def __init__(self, name): self.name = name def info(request): return render(request, 'info.html', context={'person': Person('张三')})html# info.html <p>实例化一个Person对象:{{person.name}} </p>
模板常用标签
标签被包围在 {% 和 %} 中,就像这样:
{% csrf_token %}if标签:if-elif-else-endif.if标签中可以使用==,!=,<,<=,>,>=,in,not in,is,is not等判断运算符html{% if age >= 18 %} <p>成年</p> {% else %} <p>未成年</p> {% endif %}for ... in ...标签:类似于Python中的for ... in .... 可以遍历列表、元组、字符串、字典等一切可遍历对象html{% for person in persons %} <p>{{ person.name }}</p> {% endfor %}如果需要反向遍历,需要加上
reversedhtml{% for person in persons reversed %} <p>{{ forloop.counter0 }} {{ person.name }}</p> {% endfor %}在
for循环中,DTL还提供了一些变量可供使用:forloop.counter:当前循环的下标,从1开始forloop.counter0:当前循环的下标,从0开始forloop.revcounter:当前循环的反向下标,从n->1forloop.revcounter0:反向下标,从n->0forloop.first:是否第一次遍历forloop.last:是否最后一次遍历
for ... in ... empty ...:与for ... in ...的区别在于当遍历的对象如果为空时,执行empty中的内容html{% for person in persons %} <p>{{ person.name }}</p> {% empty %} <p>暂时没有任何人</p> {% endfor %}with标签:在模板中定义变量。有时候对一个变量访问比较繁琐,可以先将这个变量缓存到新建的一个变量上进行使用
context = {"persons": ["张三", "李四"]}

{% with Li=persons.1 %}
  <p>{{ Li }}</p>
{% endwith %}url标签:它的主要作用是根据urls.py中的名称(name)动态生成URL,而不是硬编码URL路径,这使得项目更易于维护
<a herf="{% url 'blog_app:article_list' %}">文章列表</a>如果url反转的时候需要传递参数,可以传位置参数和关键字参数,但是两种参数不能同时使用, 多个参数间使用空格分隔:
# url.py
path('article_detail/<int:id>/', views.article_detial, name='article_detail')# 位置参数
<a herf="{% url 'blog_app:article_detail' 1 %}">图书详情页面</a>
# 关键字参数
<a herf="{% url 'blog_app:article_detail' id=1 %}">图书详情页面</a>
# 需手动添加query-string
<a herf="{% url 'blog_app:article_detail' id=1 %}?page=1">图书详情页面</a>模板常用过滤器
过滤器就是模板的函数,有时需要对一些数据进行处理后才能使用,因此需要模板过滤器,常用的有这些
add:将右边的参数累加到左边的值。这个过滤器会尝试将值和参数转换成整型再相加。如果转换成整型失败,那么会将值和参数进行拼接。如果是值是字符串,则会拼接字符串;如果值是列表,则会拼接成一个新列表html{{ value|add:"2" }}cut:移除值中所有指定的字符串。类似于pyhton的replace(args, " ")html{{ value|cut:" " }}date:将一个日期按照指定的格式,格式化成字符串pythoncontext = { "birthday": datetime.now() }html<p>{{birthday|date:"Y/m/d"}}</p>default:如果值是[], "", {}, None等在if判断中为False的值, 则使用default过滤器提供的默认值:html<p>{{value|default:"nothing"}}</p>floatformat:使用四舍五入的方式格式化一个浮点类型。如果这个过滤器没有传递参数则默认保留一位小数,如果小数点后面全是0则只会保留整数。参数值代表要保留几位小数html# 假设value = 3.1415 {{value|floatformat}} -> 3.1 {{value|floatformat:2}} -> 3.14join:类似Python中的join,将列表\元组\字符串用指定的字符进行拼接html{{value|join:"-"}}length: 获取一个列表\元组\字符串\字典的长度html{{value|length}}safe:标记一个字符串是安全的,即关掉字符串的自动转义
当值是html语句时,可以自动转义成网页效果html# 假设value = <h1>标题 1</h1> {{value|safe}}slice:切片过滤器,类似Python中的切片操作。可以对列表\元组\字符串进行切片操作html{{value|slice:":3"}} # 取前3个元素 {{value|slice:"2:4"}} # 取第2到第4个元素striptags:移除字符串中的html标签html{{value|striptags}}
模板结构
include标签{% include %}标签用于在当前模板中包含另一个模板的内容,实现模板的模块化和代码复用。
应用场景:- 将页面的公共部分(如页眉、页脚、导航栏)提取为单独文件
- 包含重复使用的UI组件
- 动态加载不同部分的模版
示例如下:
<!-- parent.html -->
{% with secret_key="12345" public_info="Welcome" %}
    <!-- 包含子模板,不使用 only -->
    {% include "child.html" with message="Hello" %}
{% endwith %}

<!-- child.html -->
<p>消息: {{ message }}</p>          {# 能访问显式传递的 message #}
<p>公共信息: {{ public_info }}</p>  {# 能访问父模板的 public_info #}
<p>密钥: {{ secret_key }}</p>      {# 意外暴露了 secret_key #}
输出结果:
消息: Hello
公共信息: Welcome
密钥: 12345 <!-- 这可能是安全隐患! -->使用only控制子模版只能访问传给他的变量,不能访问上下文变量:
<!-- parent.html -->
{% with secret_key="12345" public_info="Welcome" %}
    <!-- 使用 only 限制访问 -->
    {% include "child.html" with message="Hello" only %}
{% endwith %}

<!-- child.html -->
<p>消息: {{ message }}</p>          {# 能访问显式传递的 message #}
<p>公共信息: {{ public_info }}</p>  {# 无法访问,变量不存在 #}
<p>密钥: {{ secret_key }}</p>      {# 无法访问,变量不存在 #}
输出结果:
消息: Hello
公共信息:
密钥:
模版继承 模板继承是 Django 模板系统中最强大的部分,允许你构建一个基础"骨架"模板,然后子模板可以覆盖骨架中的特定部分,实现代码复用和统一布局。
应用场景:- 为整个网站创建统一布局
- 根据不同应用或页面类型创建不同的基础模版
- 实现多级继承(如全站基础模版->应用基础模版->具体页面模版)
- 基础模版(base.html)
html<!DOCTYPE html> <html> <head> <title>{% block title %}默认标题{% endblock %}</title> </head> <body> {% block content %}这是父模版的body{% endblock %} </body> </html>- 子模版(index.html)
html{% extends "base.html" %} {% block title %}我的页面标题{% endblock %} {% block content %} {{ block.super }} {# 包含父模板中的内容: "这是父模版的body" #} <p>这是子模版的部分...</p> {% endblock %}
加载静态文件
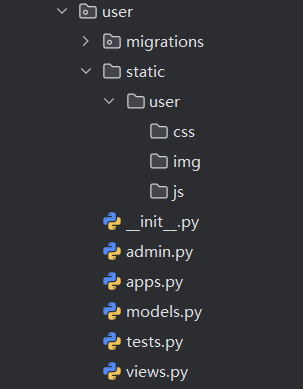
在Django项目中,每个app可以创建自己的static文件夹存放其所需的静态文件。
也有一些全局静态资源,一般存放在django项目根目录下的static文件中,以下是相关配置:
1. 首先确保 django.contrib.staticfiles 已经添加到 settings.INSTALLED_APPS 中.
2. 在 settings.py 中设置 STATIC_URL, 告诉Django每个app自己的静态资源位置
STATIC_URL = "static/"3. 建议在每个app的static文件夹下建立app同名文件夹。这样做可以避免多个app下具有同名静态文件时路径产生混淆。
4. 在setting.py中定义一个目录列表(STATICFILES_DIRS) ,告诉Django全局静态文件的位置。
STATICFILES_DIRS = [
  os.path.join(BASE_DIR,'static')
]
5. 在模版中使用load标签加载static标签,示例代码如下:
{% load static %}

<!-- CSS 文件 -->
<link rel="stylesheet" href="{% static 'css/style.css' %}">

<!-- JavaScript 文件 -->
<script src="{% static 'js/main.js' %}"></script>

<!-- 图片 -->
<img src="{% static 'images/logo.png' %}" alt="Logo">
数据库的配置和使用
配置数据库
Windows 以MySQL为例,首先需要安装
mysqlclient库(需要先安装mysql数据库),可以使用以下命令安装:bashpip install mysqlclientUbuntu
- 安装系统依赖
bashsudo apt install python3-dev default-libmysqlclient-dev build-essential pkg-config libssl-dev- 安装
mysqlclient
bashpip install mysqlclient
然后在Django项目的settings.py文件中配置数据库连接信息。以下是一个MySQL数据库的配置示例:
# project_demo/settings.py
DATABASES = {
  'default': {
    # 数据库引擎(是mysql还是oracle等)
    'ENGINE': 'django.db.backends.mysql',
    # 数据库名
    'NAME': 'database_demo ',
    # 连接数据库的用户名
    'USER': 'root',
    # 连接数据库的密码
    'PASSWORD': '123qwe',
    # 数据库的主机地址
    'HOST': '127.0.0.1',
    # 数据库的端口号
    'PORT': '3306',
  }
}原生SQL操作数据库
使用原生 sql 语句操作数据库其实是使用 python db api来操作的,比如mysql使用的 api 是 mysqlclient(需要pip install mysqlclient) 示例代码:
# connection对象会自动读取setting.py中数据库的配置信息
from django.db import connection

# 获取游标对象
cursor = connection.cursor()
# 执行SQL语句
cursor.execute("SELECT * FROM student")
# 获取所有的数据
rows = cursor.fetchall()
# 遍历查询到的数据
for row in rows:
print(row)- 游标对象常用api
- 执行sql语句python
# 执行一次sql语句 cursor. execute(<sql语句>, params=None) # params可以是列表、元组或字典 # 示例 cursor.exexute("SELECT * FROM student WHERE id = %s", [1]) cursor.execute( "SELECT * FROM myapp_mymodel WHERE id = %(id)s AND status = %(status)s", {'id': 1, 'status': 'active'})python# 多次执行同一sql语句,每次使用不同参数 cursor.executemany(sql, param_list) # param_list 为列表类型 # 示例 data = [(1, 'John'), (2, 'Jane'), (3, 'Mike')] cursor.executemany("INSERT INTO student (id, name) VALUES (%s, %s)", data) - 获取查询结果的一行或多行python
# 获取查询结果的下一行 row = cursor.fetchone() # 获取查询结果的多行 rows = cursor.fetchmany(size=None) # size: 行数 # 获取查询结果的所有剩余行 all_rows = cursor.fetchall() - 关闭游标python
# 注意:关闭游标后此游标不能再次使用
cursor.close()
- 执行sql语句
ORM模型
ORM, 全称 Object Relational Mapping ,即对象关系映射, 是Django框架的核心组件之一,它提供了一种高级的Pythonic方式来与数据库交互,而不需要直接编写SQL语句。使用 ORM 有以下优点:
- 开发效率高:减少SQL编写,快速构建数据层
- 安全性:自动防止SQL注入
- 可维护性:集中管理数据模型
- 灵活性:支持多种数据库后端,易于迁移
创建ORM模型
在Django中,ORM模型通常定义在APP的 models.py 文件中。每个模型对应数据库中的一张表,类的属性对应表中的字段。
from django.db import models

class Book(models.Model):
  # 字符串类型,最大长度100字符
  title = models.CharField(max_length=100)
  # 字符串类型,最大长度50字符
  author = models.CharField(max_length=50)
  # 日期类型(默认为当前日期)
  published_date = models.DateField(auto_now_add=True)
  # 小数类型,最多5位数,小数点后2位
  price = models.DecimalField(max_digits=5, decimal_places=2)

  def __str__(self):
      return self.title  # 返回书名作为字符串表示
常用字段类型
字符串相关
- CharField
models.CharField(max_length=100)
用于存储短文本,必须指定max_length - TextField
models.TextField()
用于存储长文本,不需要指定max_length - EmailField
models.EmailField(max_length=254)
专门用于存储电子邮件地址,会自动验证格式 - URLField
models.URLField(max_length=200)
用于存储URL地址,会自动验证格式
- CharField
数字相关
- IntegerField
models.IntegerField()
用于存储整数,范围-2147483648到2147483647 - PositiveIntegerField
models.PositiveIntegerField()
用于存储非负整数,范围0到2147483647 - smallIntegerField
models.SmallIntegerField()
用于存储小整数,范围-32768到32767 - BigIntegerField
models.BigIntegerField()
用于存储大整数,范围-9223372036854775808到9223372036854775807 - DecimalField
models.DecimalField(max_digits=5, decimal_places=2)
用于存储精确的小数,max_digits表示总位数,decimal_places表示小数点后位数 - FloatField
models.FloatField()
用于存储浮点数
- IntegerField
日期和时间相关
- DateField
models.DateField(auto_now=True, auto_now_add=True)
用于存储日期(年月日)auto_now_add=True: 创建时自动设置为当前日期auto_now=True: 每次保存时自动更新为当前日期 - DateTimeField
models.DateTimeField(auto_now=False, auto_now_add=False)
用于存储日期和时间(年月日时分秒) - TimeField
models.TimeField()
只存储时间(时分秒)
- DateField
布尔类型相关
- BollanField
models.BooleanField(default=False)
用于存储布尔值(True/False),可以指定默认值 - NullBooleanField
models.NullBooleanField(default=None)
用于存储True、False或None三种状态
- BollanField
关系字段
- ForeignKey
models.ForeignKey(related_name='books', on_delete=models.CASCADE)
用于一对多关系,related_name指定反向查询名称,on_delete指定删除时的行为 - ManyToManyField
models.ManyToManyField(related_name='authors')
用于多对多关系,related_name指定反向查询名称 - OneToOneField
models.OneToOneField(related_name='profile', on_delete=models.CASCADE)
用于一对一关系,类似于ForeignKey,但每个对象只能有一个关联对象
- ForeignKey
文件相关字段
- FileField
models.FileField(upload_to='uploads/')
用于存储文件,upload_to指定上传目录 - ImageField
models.ImageField(upload_to='uploads/')
用于存储图片,继承自FileField,会自动验证图片格式
- FileField
其他特殊字段
- UUIDField
models.UUIDField(default=uuid.uuid4, editable=False)
用于存储UUID,通常用于唯一标识符 - SlugField
models.SlugField(max_length=50, unique=True)
用于存储URL友好的字符串,通常用于SEO优化 - BinaryField
models.BinaryField()
用于存储二进制数据 - JSONField
models.JSONField()
用于存储JSON格式数据,支持多种数据库后端
- UUIDField
常用字段参数
大多数字段类型都支持以下常用参数:
null: 是否允许存储NULL值,默认为Falseblank: 是否允许字段为空,默认为Falsedefault: 字段的默认值unique: 是否唯一,默认为Falsedb_index: 是否创建数据库索引,默认为Falseverbose_name: 字段的可读名称,通常用于表单显示choices: 可选值列表,通常用于下拉选择框, 如:pythonSTATUS_CHOICES = [ ('d', 'Draft'), ('p', 'Published'), ('a', 'Archived'), ] status = models.CharField(max_length=10, choices=STATUS_CHOICES, default='d')
ORM基础操作(增删改查/CRUD)
创建数据(Create)
from myapp.models import Book  # 导入模型
# 创建一条新记录
book = Book(title='Python Program', author='Alice', price=39.99)
book.save()  # 保存到数据库
查询数据(Read)
  # 获取所有书籍, 返回一个QuerySet对象
  from myapp.models import Book  # 导入模型
  books = Book.objects.all()

  # 根据条件查询
  # 模糊查询书名包含'Python'
  python_books = Book.objects.filter(title_contains='Python')

  # 获取单条记录
  first_book = Book.objects.first()  # 获取第一条记录
更新数据(Update)
# 更新书籍价格
book = Book.objects.get(id=1)  # 获取id为1的书籍
book.price = 29.99  # 修改价格
book.save()  # 保存修改
删除数据(Delete)
# 删除书籍
book = Book.objects.get(id=1)  # 获取id为1的书籍
book.delete()  # 删除记录
模型中的Meta配置
Meta类用于定义模型的元数据,如表名、排序方式等。它是模型类的内部类。
class Book(models.Model):
  title = models.CharField(max_length=100)
  author = models.CharField(max_length=50)

  class Meta:
    db_table = 'book'  # 指定数据库表名
    ordering = ['title']  # 默认按书名排序
    verbose_name = '书籍'  # 单数形式的可读名称
    verbose_name_plural = '书籍列表'  # 复数形式的可读名称
外键
在Django ORM中,外键用于建立模型之间的一对多关系。通过外键,可以在一个模型中引用另一个模型的实例。
基本语法
from django.db import models

class Author(models.Model):
  name = models.CharField(max_length=50)

class Book(models.Model):
  title = models.CharField(max_length=100)
  author = models.ForeignKey(Author, related_name='books', on_delete=models.CASCADE)  # 外键关联到Author模型
关键参数说明
- to_field: 指定关联的字段,默认为主键字段
- related_name: 指定反向查询名称(默认是
<model_name>_set)- 如上例中,
related_name='books'允许通过author.books_set.all()获取该作者的所有书籍
- 如上例中,
- related_query_name: 指定反向过滤器名称
- on_delete: 指定删除外键关联对象时的行为
models.CASCADE: 级联删除(默认值), 如删除作者时,自动删除其所有书籍models.PROTECT: 保护模式, 删除作者时阻止删除其书籍models.SET_NULL: 删除关联对象时,将当前对象的外键字段设置为NULLmodels.SET_DEFAULT: 删除关联对象时,将当前对象的外键字段设置为默认值models.DO_NOTHING: 什么都不做,可能导致数据不一致
- db_constraint: 是否在数据库中创建外键约束,默认为
True
创建和应用迁移
在定义好模型后,需要将模型映射到数据库中:
创建迁移文件:
bash# 将在project/migrations目录下生成迁移文件 python manage.py makemigrations应用迁移:
bash# 将迁移文件应用到数据库, 将在数据库中生成相应数据表 python manage.py migrate查看迁移状态:
bashpython manage.py showmigrations回滚迁移:
bash# 回滚到指定迁移版本 python manage.py migrate app_name migration_name
数据库与模型类
由模型类自动创建表结构
- django中定义模型类:
# blog/models.py
from django.db import models
from django.contrib.auth.models import User
from django.utils import timezone

class Post(models.Model):
    title = models.CharField(max_length=100)
    content = models.TextField()
    date_posted = models.DateTimeField(default=timezone.now)
    date_updated = models.DateTimeField(auto_now=True)
    # 作者,ForeignKey 定义一对多关系(一个用户可写多篇文章)
    # on_delete=models.CASCADE 表示如果用户被删除,他的所有文章也被删除
    author = models.ForeignKey(User, on_delete=models.CASCADE)

    # 定义对象的字符串表示形式,这在Django admin和管理shell中很有用
    def __str__(self):
        return self.title

    # 定义元数据,例如数据库表名排序规则
    class Meta:
        # 默认排序,按发布日期降序排列,最新的文章排在最前面
        ordering = ['-date_posted']

        # 如果不指定,Django会自动生成表名,格式为 appname_modelname (blog_post)
# db_table = 'blog_posts' 可以自定义表名- 创建迁移文件
python manage.py makemigrations blog- 执行迁移
python manage.py migrateDjango 会在你的数据库中创建一个名为 blog_post 的表
由数据库自动创建模型类
- 检查数据库,生成
Model代码,将生成的代码保存至对应models.py
# 覆盖models.py
python manage.py inspectdb --database default 表名 > app名/models.py

# models.py中追加
python manage.py inspectdb --database default 表名 >> app名/models.py- 检查并调整生成的模型
# This is an auto-generated Django model module.
# You'll have to do the following manually to clean this up:
#   * Rearrange models' order
#   * Make sure each model has one field with primary_key=True
#   ... (其他注释说明)

from django.db import models

class BlogPosts(models.Model): # 假设原有表名为 'blog_posts'
    id = models.AutoField(db_column='ID', primary_key=True)
    title = models.CharField(db_column='TITLE', max_length=200)
    content = models.TextField(db_column='CONTENT')
    author_id = models.IntegerField(db_column='AUTHOR_ID')
    # 最初可能不会正确识别为外键,可能需要你手动修改
    # 修改后:
    # author = models.ForeignKey('auth.User', models.DO_NOTHING, db_column='AUTHOR_ID')
    created_at = models.DateTimeField(db_column='CREATED_AT')

    class Meta:
        managed = False # 非常重要!这告诉Django要不要管理此表的生命周期
        db_table = 'blog_posts' # 指定该模型对应的原始数据库表名
<本篇完>